As we touched on when configuring the in-app purchase settings the “Products Screen” is a dedicated screen in your app, that displays specific products that you have assigned to be displayed on the Products Screen. This is especially useful for selling membership tiers that you want to be clearly visible for purchase on a dedicated pricing tier page. You can also use this screen to advertise courses you for purchase, if that makes sense for your app. Free Products can be added to this screen as well, giving users the option to pay for a Paid Product, or just use a Free Product if they are not ready to buy.
Don’t worry when enabling the In-app purchase component at the beginning which is located in your Buddyboss App – Component menu, we created this dedicated product screen for you in the background so all you have to do is add your products which will automatically populate in this ‘Product Screen’.
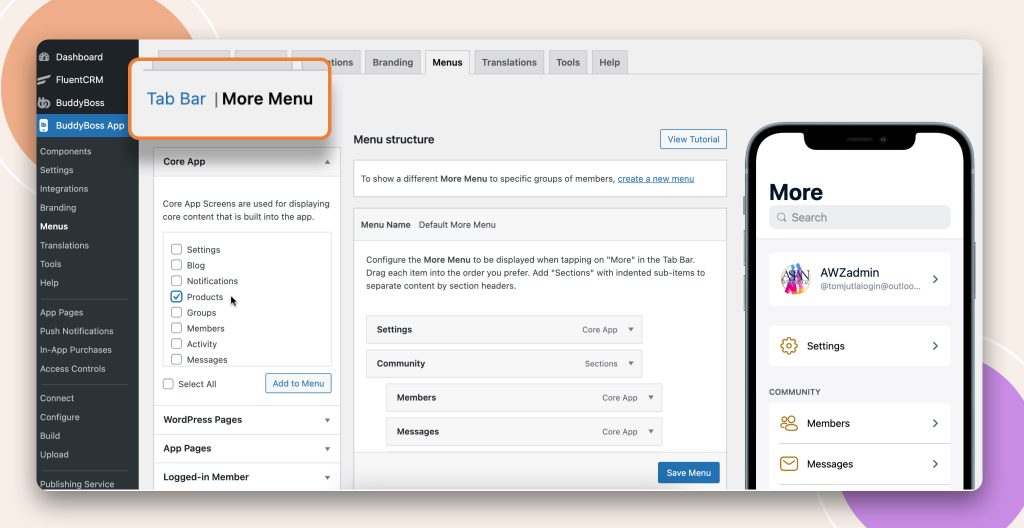
Accessing the Product Screen
You can add the Products Screen to your Tab Bar or More Screen. To do this, go into BuddyBoss App > Menu > Tab Bar, and from the “Core App” section, you will see a “Products” page that you can add. Then once your members are using your app, at any time they can visit the Products menu to see their current active membership or course product, and to buy or switch to another membership or course.
You can easily re-order products in your Products Screen. Just go to BuddyBoss App > In-App Purchases > Products. You can drag and drop products from the table into any order. The products that are assigned to be visible in your Products Screen will display in the order you have set. Additionally, if multiple products are able to unlock a LearnDash Course, when viewing the purchase modal on the course, the products in
Remember you can edit the Product Screen message, go to BuddyBoss App > Settings > In-App Purchases.


