Firstly to get started we need to setup a few things within your Buddyboss WordPress Admin, this will turn on in-app purchase other wise known as IAP’s for short.
Enabling In-App Purchases
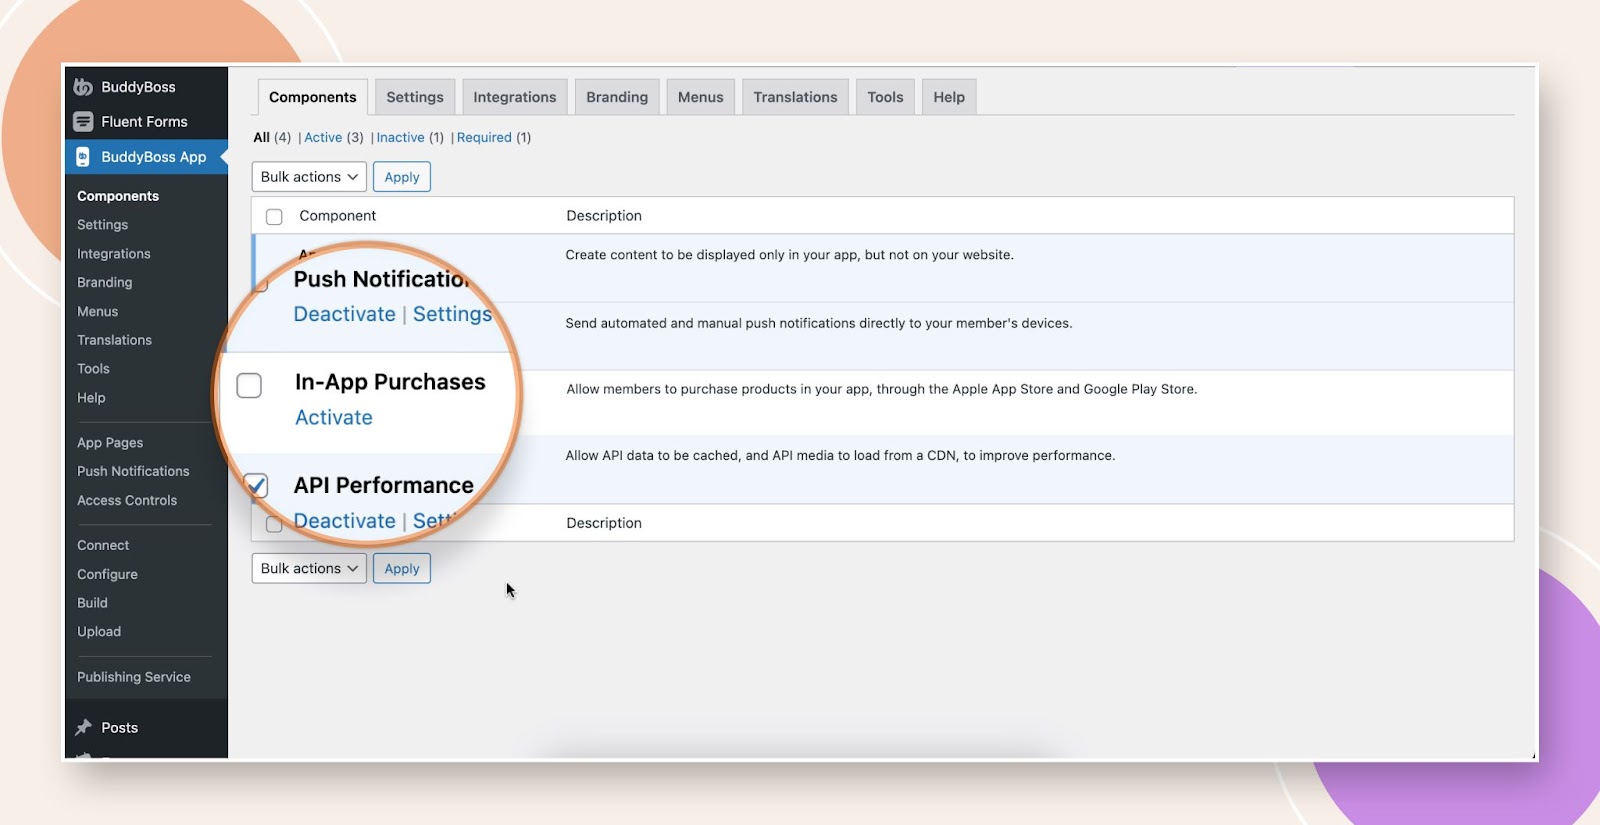
The first step is to enable the In-App Purchases component. In your WordPress admin area, go to BuddyBoss App > Components. From there, you can enable In-App Purchases.
In-App Purchase Settings
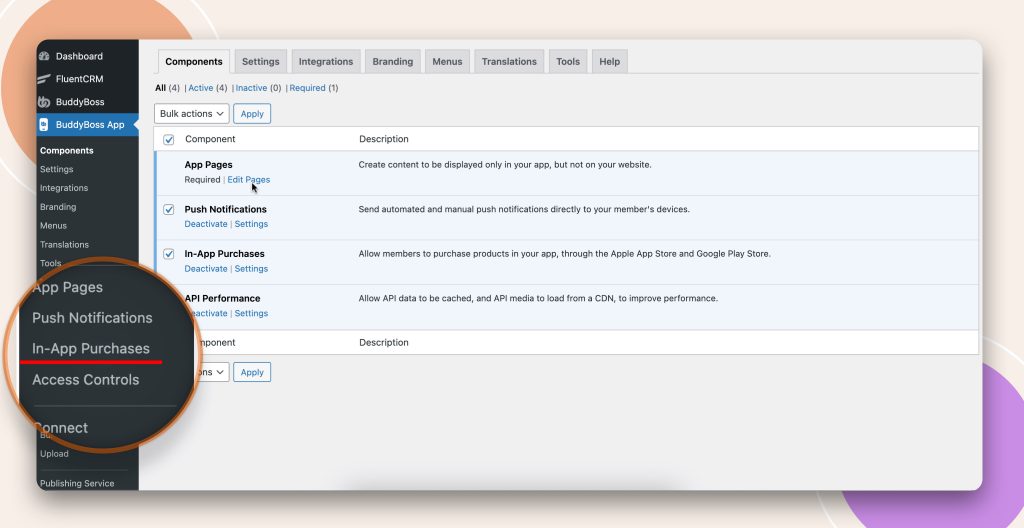
Once you have enabled the In-App Purchases component via BuddyBoss App > Settings > In-App Purchases. You will notice a new in-app purchase menu tab show up within your admin bar under your Buddyboss App plugin which will be used later on to manage your in-app products and purchases.
Instead Now you can start adjusting the In-app purchase settings by navigating to Buddyboss App – Settings – In-app purchase.
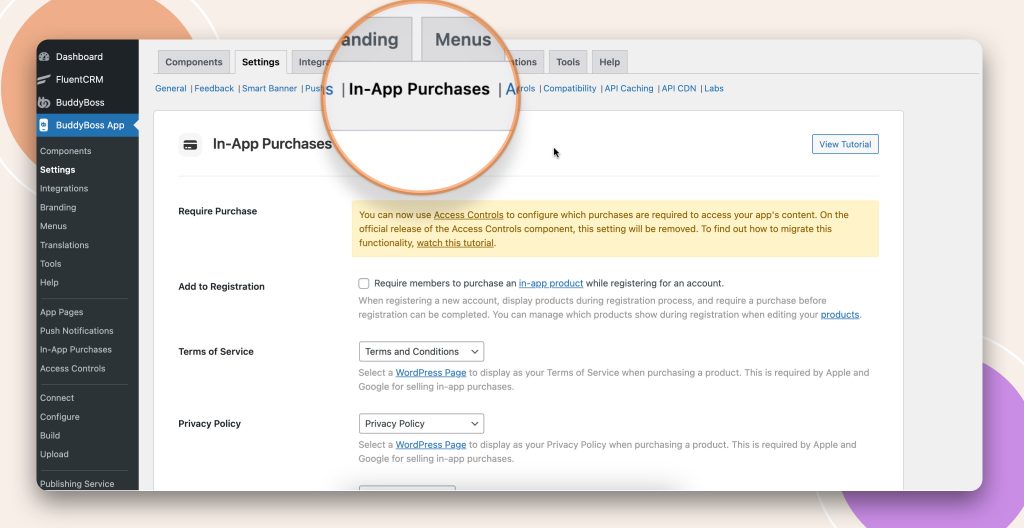
The first option is “Require Purchase”. If you check this option, when your members first log into the app, they will be required to purchase a product before they can advance into viewing the rest of the content in the app. The products they can choose from will be limited to just the ones you have assigned to your Products Screen. If you do not use this option, you can still add the Products Screen menu into your Tab Bar or More Menu later on.
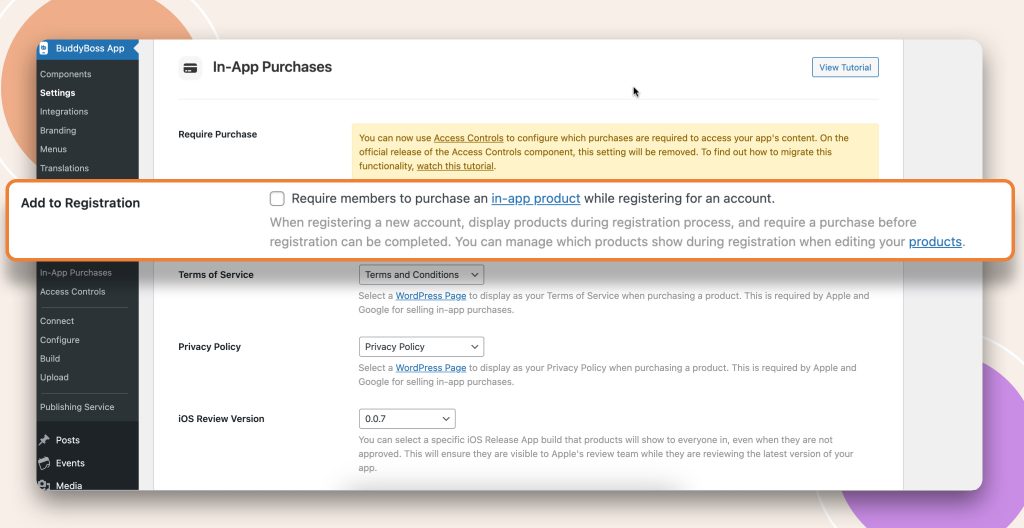
If you check this option, you will get a drop down to select where you would like your products shown; Before Registration, this will then force the user to select a product such as a membership before they carry on with your sign up/registration form. On Registration, this will force the user to select a product such as a membership level after they have filled out all their information on your sign up form. After Registration, This will allow your new sign ups to complete the full registration process and enter your app without being asked to select a product such as a membership tier, in which case, they will be able to access your product screen, which we will show you how to setup further on in this coarse.
The next options are for “Terms of Service” and “Privacy Policy”. Apple and Google require that you display this information on the purchase screens, according to their In-App Purchase guidelines. You can select from any existing WordPress pages to be assigned to each option, and then when viewing a product in your app, you will see links to open the Terms of Service and Privacy Policy in popup modals. We are using WordPress pages for these settings, instead of App Pages, because we know that many of you have already created Terms of Service and Privacy Policy pages for your BuddyBoss Platform Registration Pages which are synced into the app. You can modify these pages to include some content specific to your app, and use them for your In-App Purchases as well.
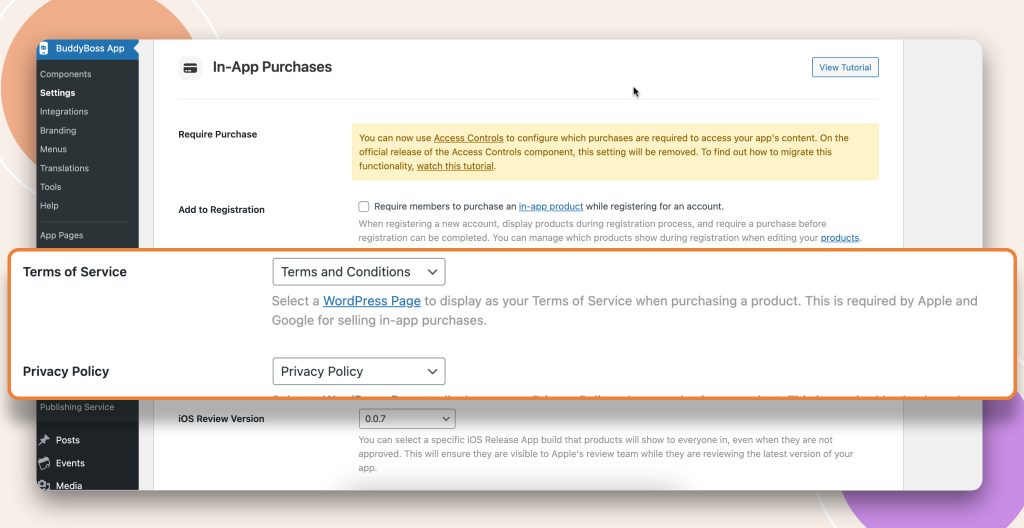
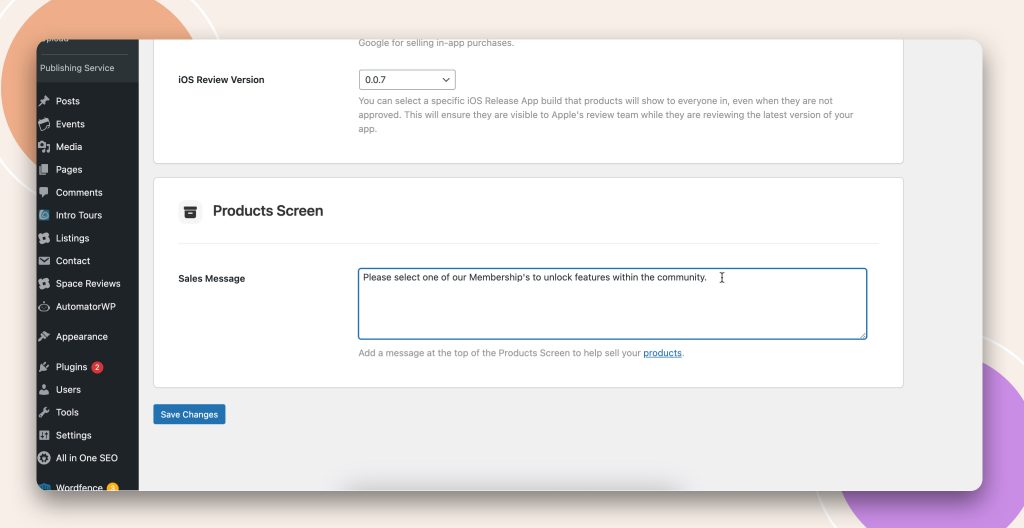
Lastly in this section you have an option called “iOS Review Version”. Apple wants full access to your app and all products to be able to pass the review stage. With this option you can select a specific iOS Release App build that products will show to everyone in, even when they are not approved. This will ensure they are visible to Apple’s review team while they are reviewing the latest version of your app.
Products Screen
Here you can write a quick catchy sales message to let your users know what they will find within your dedicated product screen and this message will then show at the top of your product screen.