Creating Products
To create In-App Products, go to BuddyBoss App > In-App Purchases. Then click on the “Products” tab.
From here you can create your products to be displayed in the app, to be optionally added to your Products Screen, and/or to be accessed from LearnDash courses in the app. In order for a product to be found in the app, it needs to be added to the Products Screens and/or to be associated with a course or membership.

Before creating any Paid Products in the plugin, you will need to have created the matching In-App Products already in your Apple Developer Account and Google Developer Account. From the plugin, you will be syncing in the product data from those external app store accounts.
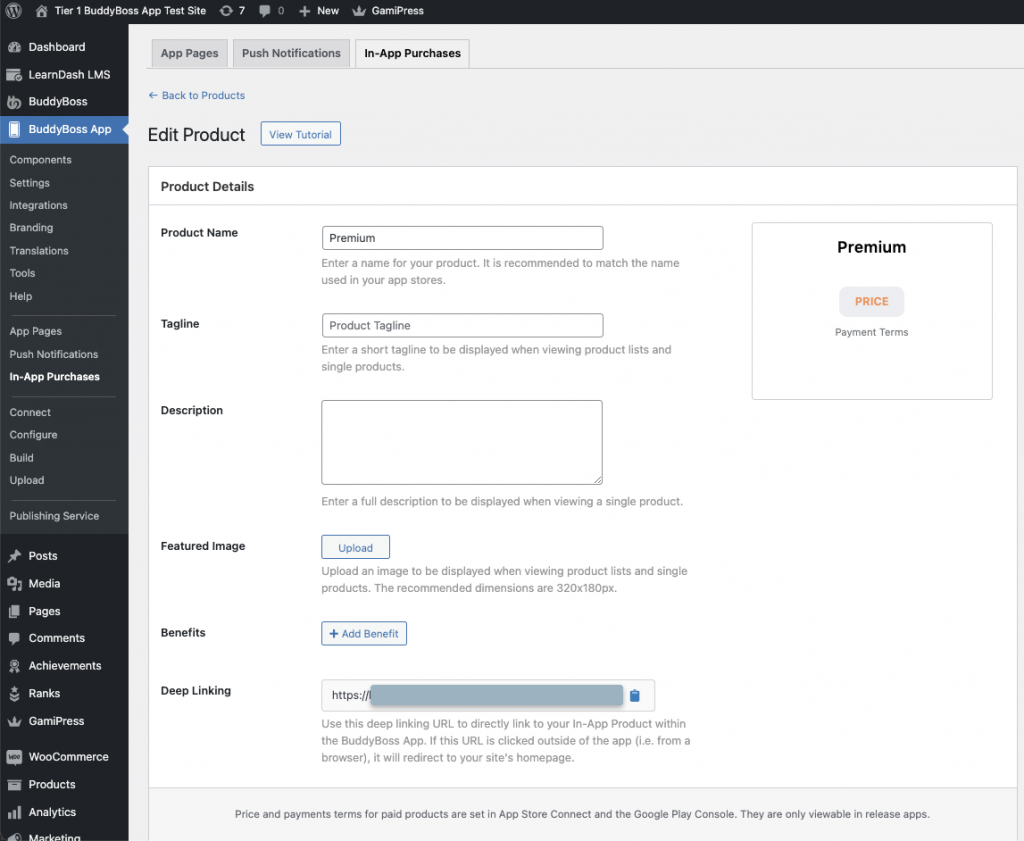
While on the Products tab in the plugin, click on “Add New”, and then follow the below steps:
- For Product Name, add a name that describes the product in just a few words.
- In most cases, we recommend using the same name as added in your Apple and Google accounts. This will make it easier to cross-check products and know which products are mapped to each other.
- For Tagline, optionally add a short sentence or phrase, explaining what the product is about.
- The Tagline will display in the Products Page, and on the single product view.
- For Description, optionally add a longer description explaining the product.
- The description will display only on the single product view.
- For Featured Image, choose the image that you wish to display in the Products Screen for this product.
- For Benefits, optionally add a list of benefits the member can expect from purchasing the product.
- The Benefits will display only on the single product view.
- The Benefits display as a checkmark list, and so the text should be short and concise.
- Benefits should highlight the features that your product offers, such as “All-courses access”.
- When creating a Subscription product in your Android account, it asks you to add a list of benefits for the subscription. You can consider pasting the same benefits here if you wish.
- For Deep Linking, you can use this deep linking URL to directly link to your In-App Product within the BuddyBoss App. If this URL is clicked outside of the app (i.e. from a browser), it will redirect to your site’s homepage.
- For Product Type, select if the product is Free or Paid.
- Free Products can be “purchased” without payment, and do not actually use In-App Purchases.
- Free Products can be tested fully from your Test App and Release App.
- Paid Products require payment, and require an associated In-App Purchase from Apple and Google.
- Paid Products can only be partially tested from your Test App and require a Release App for full testing.
- For iOS Store, check the box to enable the product in your iOS app.
- If the product type is Paid Product, you will need to select a product from your Apple Account.
- If you don’t see the product in the list, try clicking “Sync with Apple”.
- If the status says Not Approved, this means the product can still be tested, but cannot yet be purchased in a real published app, by actual users. It can still be tested from a Release App, by admins only. All products can be tested in your Test App, by all users (but will not display pricing or terms).
- If the status says Approved, this means the product was approved by Apple’s review, and can be purchased in your published app, and can be tested in your Release App by all users. All products can be tested in your Test App, by all users (but will not display pricing or terms).
- For Android Store, check the box to enable the product in your Android app.
- If the product type is Paid Product, you will need to select a product from your Google Account.
- If you don’t see the product in the list, try clicking “Sync with Google”.
- The product needs to be of the same type as your iOS product:
- Non-Consumable in iOS, corresponds to In-App Product in Android.
- Auto-Renewable Subscription in iOS, corresponds to Subscription in Android.
- Non-Renewing Subscription in iOS, corresponds to Subscription in Android.
- If the status says Inactive, this means the product will not display in your Test App or Release App.
- If the status says Active, this means the product is marked as Active in your Google Play Console, and can be viewed in your Test App. This does not mean the product is available for purchase in your published app. You will still need to get the product and app approved by Google first, and it will need to be added to a Testing Track to be testable in your Release App, by admins only.
- If both products are Subscription product types, you will see an option for Subscription Group
- Users can only subscribe to one product within a subscription group at a time, but can change subscriptions within the group as often as they like.
- View our Subscription Groups tutorial for more information.
- For Integration Type, select if the product should unlock a LearnDash Course or Membership.
- For LearnDash Course, select from one of your courses.
- Make sure the course is set to Closed, Recurring, or Buy Now in the LearnDash options.
- When viewing the course in the app, users will see a “Buy Now” button to purchase the product.
- If multiple products can unlock the course, all the products will appear in the purchase modal.
- For Membership, select from our supported membership plugins, then select a membership.
- To be visible in the app, the product will need to be added to the Products Screen.
- For LearnDash Course, select from one of your courses.
- For Products Screen, select if the product should appear on the Products Screen.
Managing Transactions
You can view your app’s In-App Purchase transactions at BuddyBoss App > In-App Purchases.
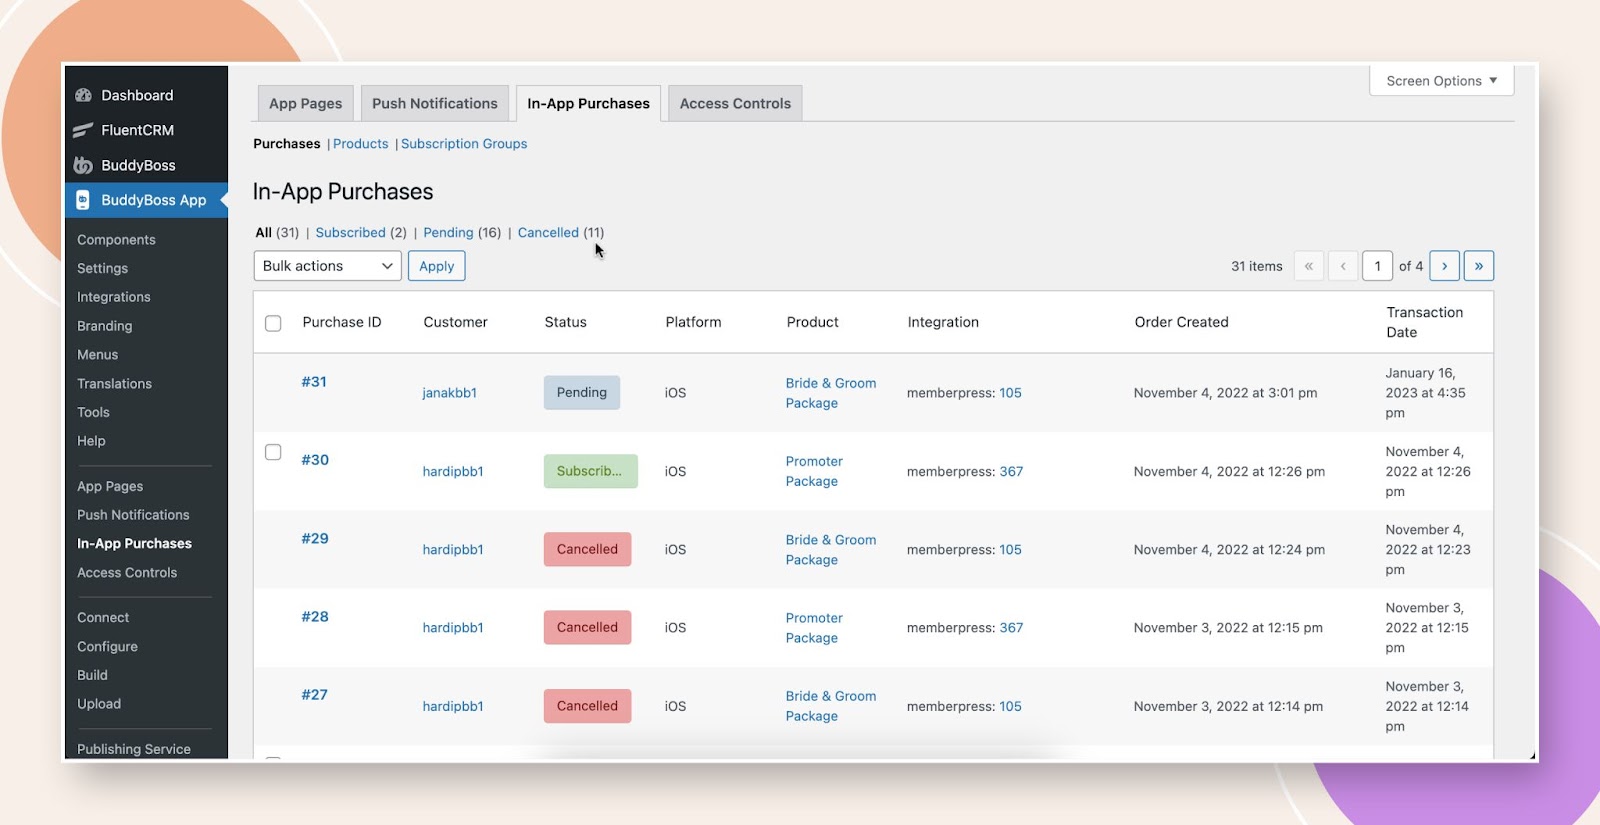
If a purchase was made in the Test App, it will be clearly indicated with a (Test App) label. You can safely revoke these test app purchases, so that you can easily test purchasing and revoking over and over as you modify your settings for your Test App.
If a purchase was made in your published Release App by a real user, you will want to be careful with revoking purchase orders. Revoking a purchase will immediately remove all access to the product purchased, and it will not automatically issue any refunds to the customer.
If a customer wants a refund for their Android purchase, you can issue their refund from the Google Play Console. If a customer wants a refund for their Apple purchase, they will need to request a refund from Apple.


