In this section, you will learn how to upload your new app build and submit it to Apple for review.
Create a new iOS Release App build
Creating a release build is done in the same way you create a test build but you must select ‘Release’ otherwise the file will not be accepted into Apple. As you can see in the image below I am in my builds and due to the many builds I have I have used the filter to help me narrow down what i am looking for seen there at the top under the the ‘Request Build’ button.
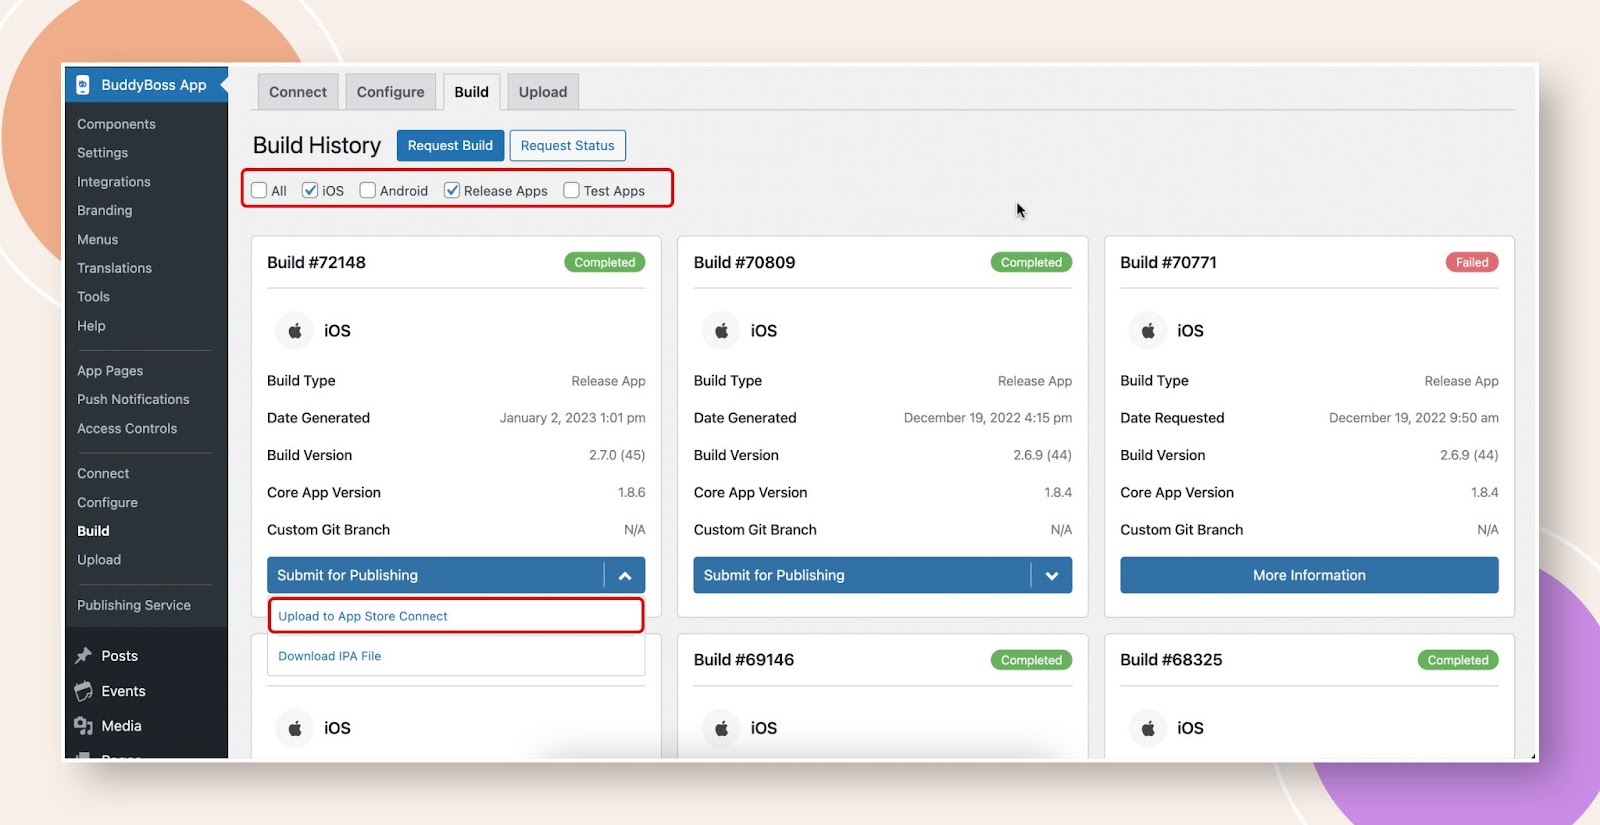
Once you have located the ‘Release’ build you would like to upload to Apple, at the bottom of the build information cards you have another blue button that using the little arrow on the right can drop down to reveal more options.
I have highlighted the option we are looking for in this instance and it is the option to ‘Upload to App Store Connect’ which we do for you. The reason we have to do this for you is because for you to do it you have to have an Apple Mac computer and have a good knowledge of Xcode which is Apple tool set software that allows you develop apps and then upload them.

Here you will use the dropdown selector in the middle of the page to select your latest build which most probably will be already populated in the box.. If you have more releases that you create but did not upload previously they will be available in the drop down if you so choose. You can only select one here so the latest build is the build you want.
Then click the big blue button that says ‘Upload Build’. You can also watch our how to video on uploading for more information – Uploading iOS Builds to App Store Connect

You will then be directed to an overview page telling you the upload to your Apple Connect Store is in progress. This can take a good few minutes so a good time to grab a coffee.
Creating Your Release App in Apple App Store Connect
So now you want to navigate over to your App Store Connect Log in and select the app that you would like to create a new version for.
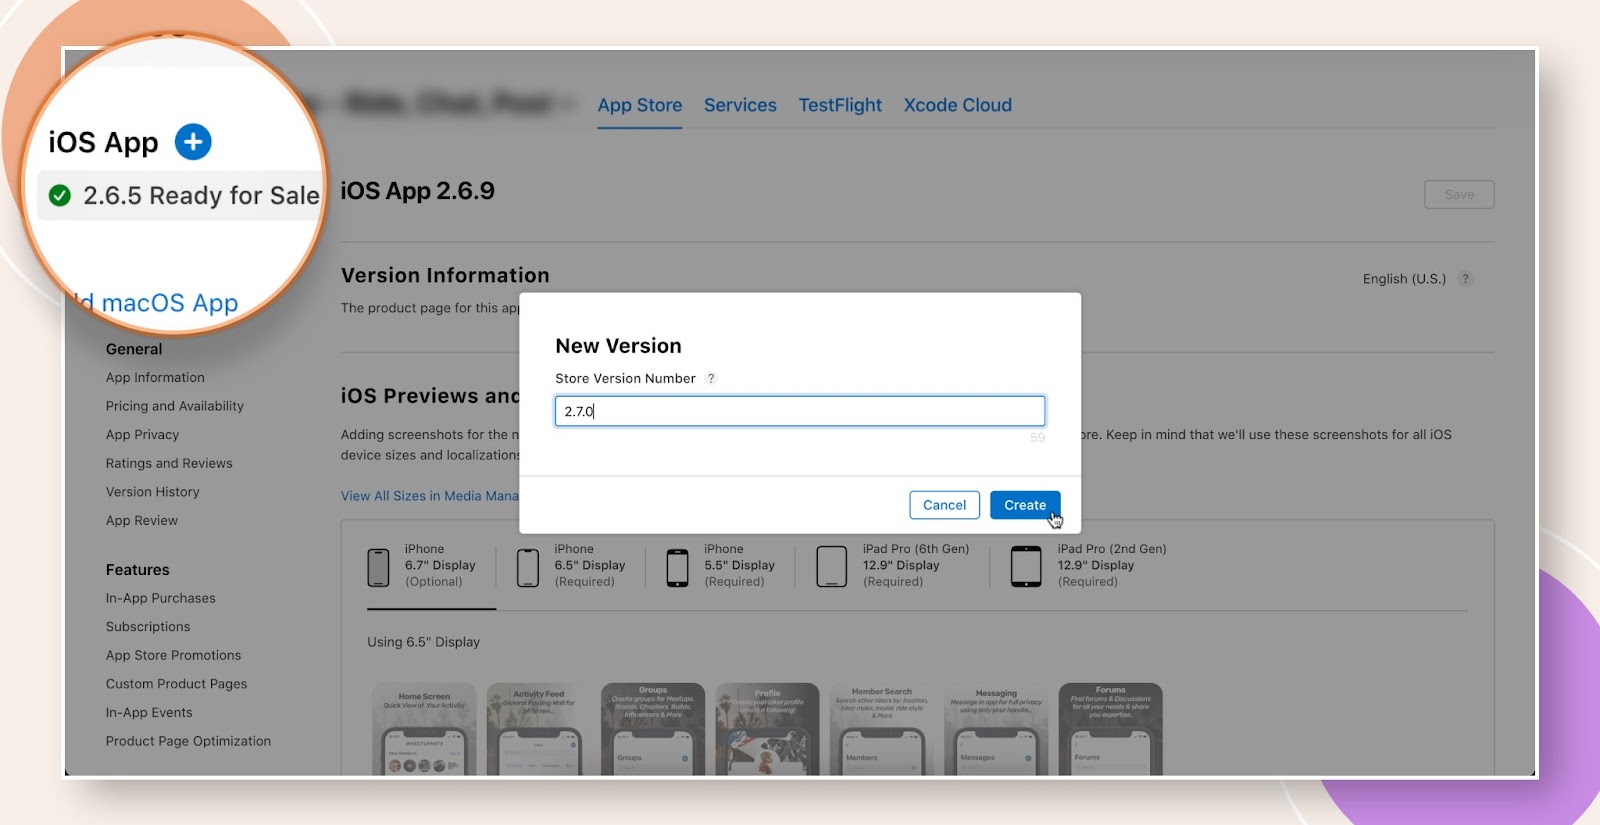
Now you are inside your existing app and in the top left corner you will see a small blue plus sign button just above your last app release with a green tick click the blue plus button to start a new version.
In the image below I have added a ‘Store Version Number’. I have used my build versions, you may find that a lot of app creators use version numbers that relate to them in some way so they can track builds if something goes wrong. Again this is up to you and no one knows what the numbers relate to except you and your team.
New Version is now created!

You can see you now have a new version available for you to allocate a build to and some information Apple requires for this next build to be added for review.
Luckily you do not have to go through all the hassle adding all the information you were required to the first time as Apple ports it all over.
What they do want from you is the two boxes in the image ‘Promotional Text’ and ‘Whats New in This Version’. With the promotional text you can jump over to your live app by selecting your iOS App with the green tick in the top left corner and copying the promotional text from there and pasting it here.
‘What’s New in This Version’ This you can be as open and honest or as vague as you like depending on whether you want to make a big splash about a feature or slide under the radar with some bug fixes, it’s up to you but you can’t leave it blank.
Select Build
The last part is to allocate a build to this new version!
So if you scroll down you will see lots of information but you are looking for the section ‘Build’

As you can see here you want to click the big blue button ‘Add Build’ – If you are not seeing this button then your build has not finished uploading to you Apple from Buddyboss, once the build has finished uploading the Apple App Store Connect account holder will receive an email letting you know it has finished processing.
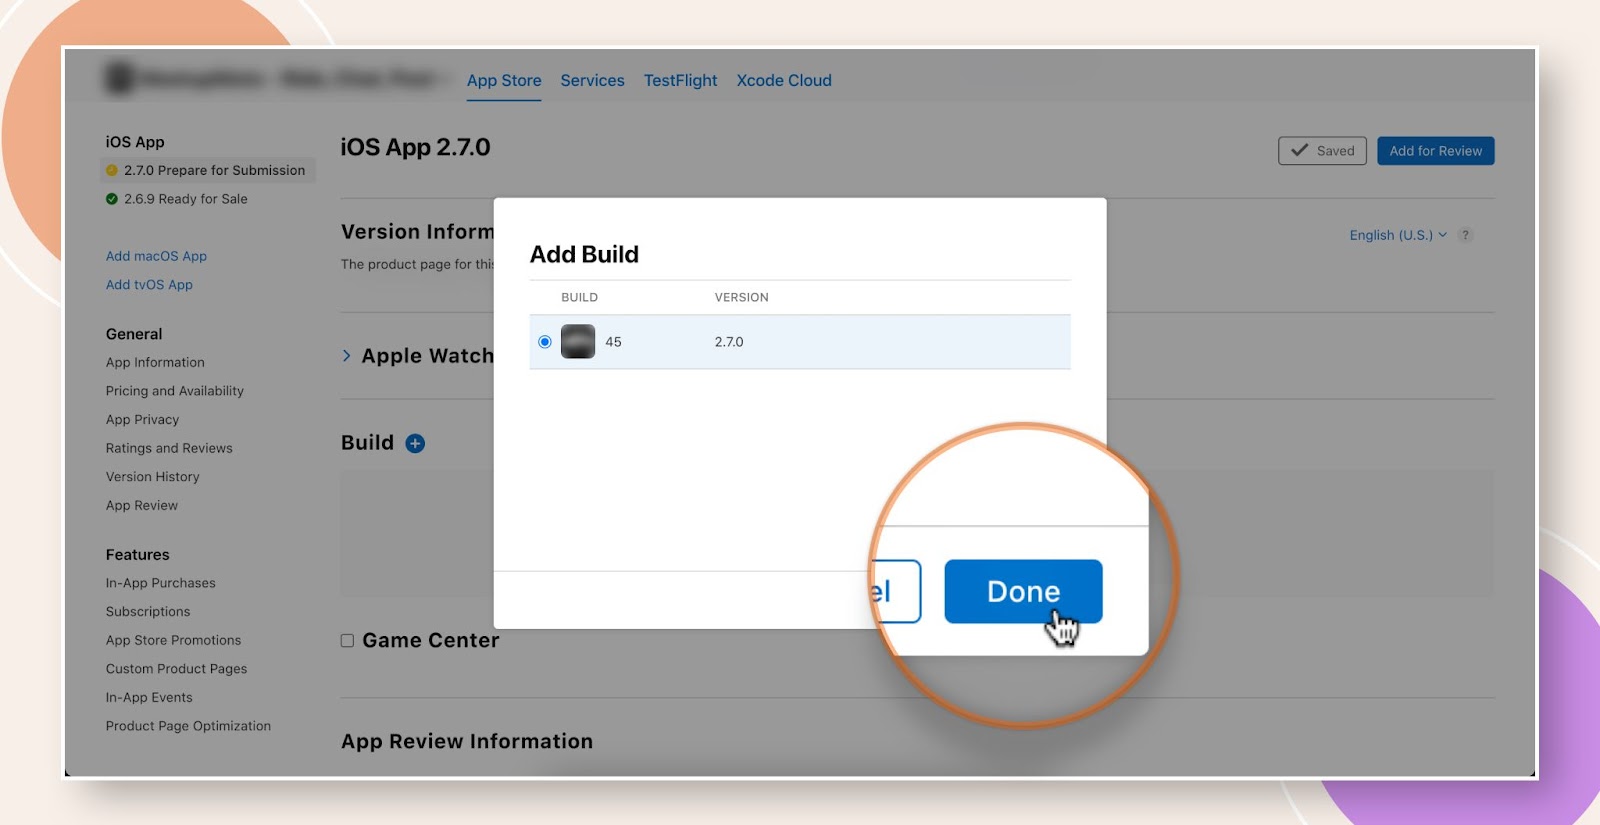
Select the build you would like to use generally you will only see one here but if you have a history of uploading builds and not using them then they will also be available to you too. Still it’s always best practice to select the latest builds and then Click the big blue button that says ‘Done’.

You will see your new build has been added which is great now you just have to add it for review using the ‘Add for Review’ button in the top right corner. It’s still grayed out.. just click ‘Save’ and now you can add for review so go ahead and click!
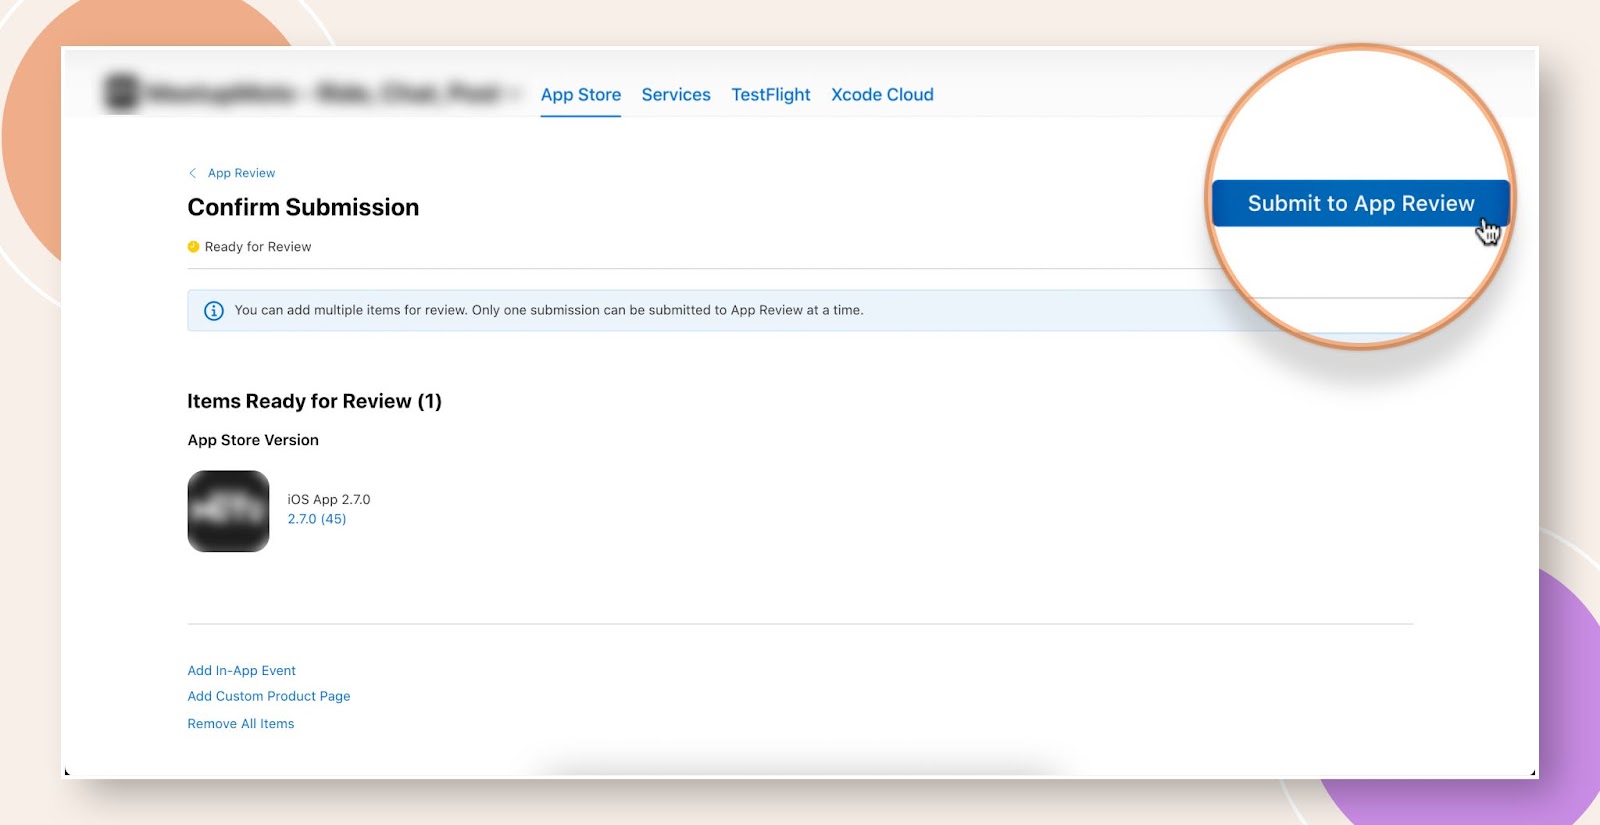
Submit to App Review!
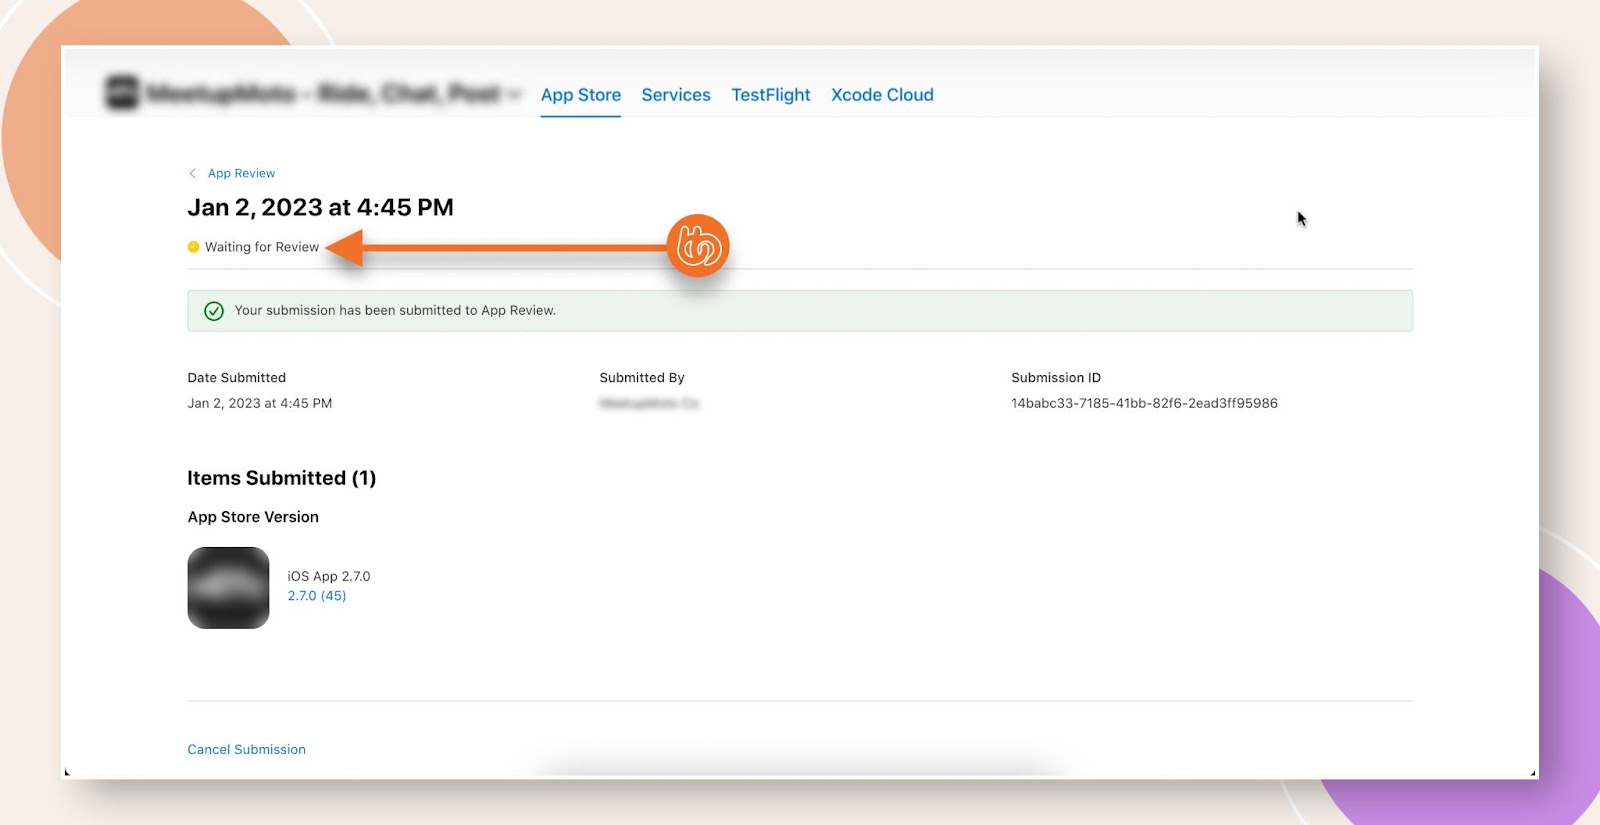
Congratulations you are complete… Well in Apple review
Respond to Apple Rejections
Apple may reject your submission if they believe your app is out of compliance with their App Store Review Guidelines.
You can correspond with Apple through the Resolution Center until you resubmit the build to App Review. You can include attachments in your replies, such as screenshots and supporting documents. If your app has been rejected because of a metadata issue (such as screenshots or store descriptions), you can resolve the issue and resubmit the same build.
To read and reply to communications from Apple, follow these steps
- Log into App Store Connect
- Click on My Apps, and then click on your app
- At the top of the page, click the link that indicates there is one or more unresolved issues
The Resolution Center appears showing communications in the left column and the selected communication on the right.
- In the left column, choose a communication to view the details
- The communications are grouped by thread with App Store App Review communications appearing before Beta App Review communications
- To reply, enter text in the Reply field
- To include a file, click Attach File and in the dialog that appears, choose a file
- Click Send
For a smooth approval process, review the common missteps for various guidelines that can slow down the review process or trigger a rejection. Here’s a list of solutions for some common app review guidelines.
After Approval by Apple
If you chose to automatically release your app version to the Apple App Store, your app should now be released. Please note that it can take up to 24 hours for your app to be available on the Apple App Store.
If you select to automatically release your app version on a specific date, then it will be available on the Apple App Store on that date.
If you chose to manually release your app version into the Apple App Store, you can now log into your App Store Connect account and do so.


