Update Your Android App
In this section, you will learn how to upload your new app build and submit it to Google for review.
Create a new Android Release App build
Creating a release build is done in the same way you create a test build but you must select ‘Release’ otherwise the file will not be accepted into Google. As you can see in the image below I am in my builds and due to the many builds I have I have used the filter to help me narrow down what I am looking for seen there at the top under the ‘Request Build’ button.

Once you have located the ‘Release’ build you would like to upload to Google, at the bottom of the build information cards you have another blue button that using the little arrow on the right can drop down to reveal more options.
I have highlighted the option we are looking for in this instance and it is the option to ‘Download AAB File’ and this will download the file to your computer’s downloads folder.
Why is there an option to download an APK file underneath? Well this is an old format that Google used to require their apps to be submitted in but is old technology and the new AAB files are smaller hence more efficient. We provide the option to download the APK file for those who may have specific reasons to need it but I can guarantee you this is not you.
Resubmit to Google for Review
Now you will need to create a new version of your app which Google calls ‘Production Release’. Do not worry this is not the same as creating your app for the first time again which we know was a lengthy process… With a Production Release, Google remembers all of your apps settings and just wants your new build and a couple of words about what’s changed.
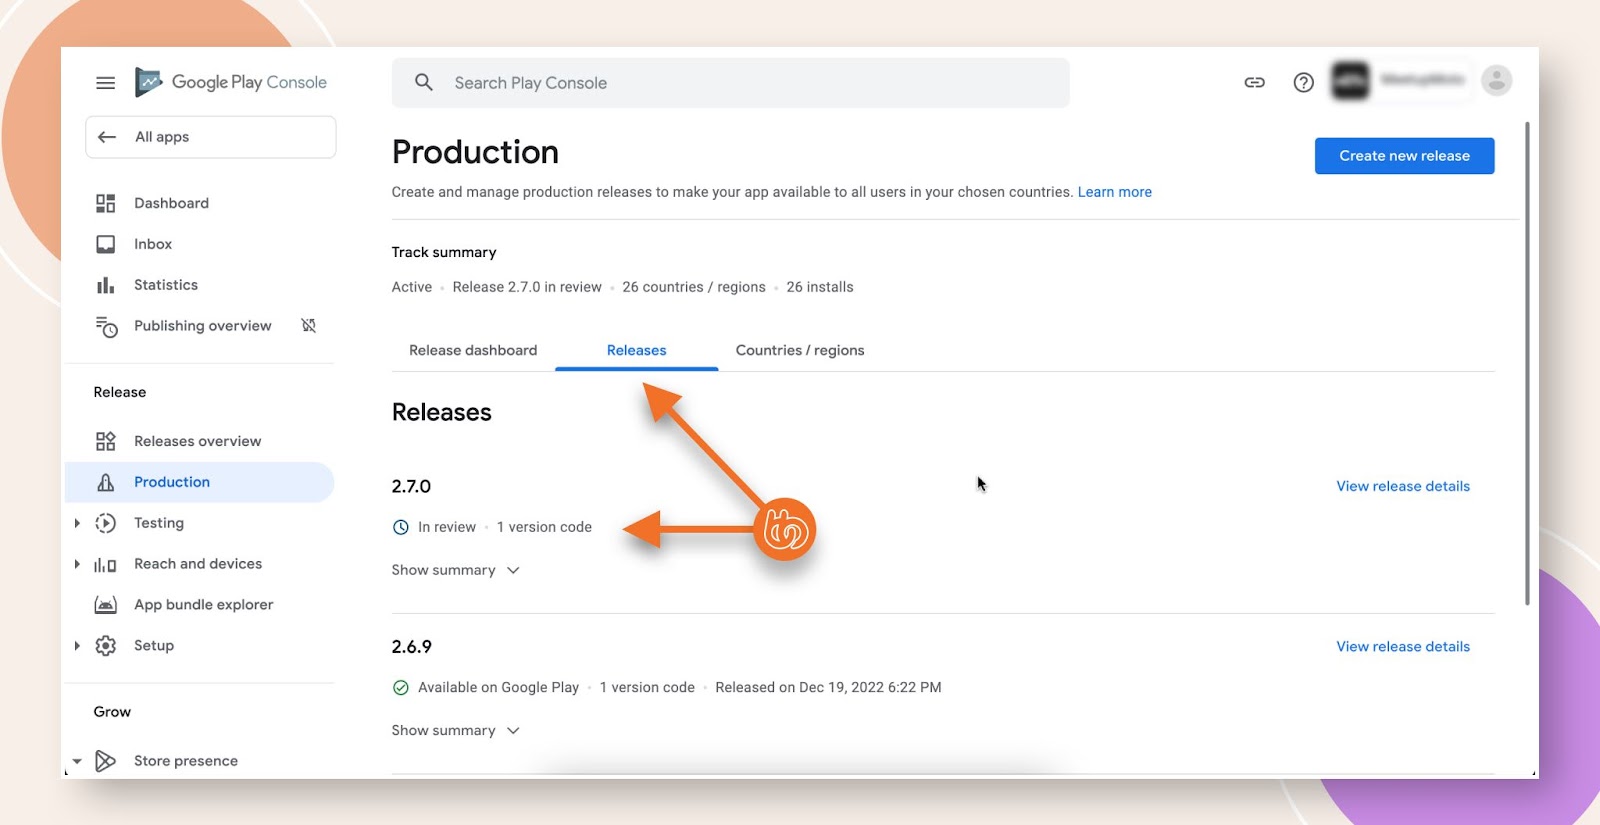
First you will need to Navigate to your Google Developer Account log in and select the app you wish to update then scroll down to ‘Production’ under ‘Release’. See the image below.
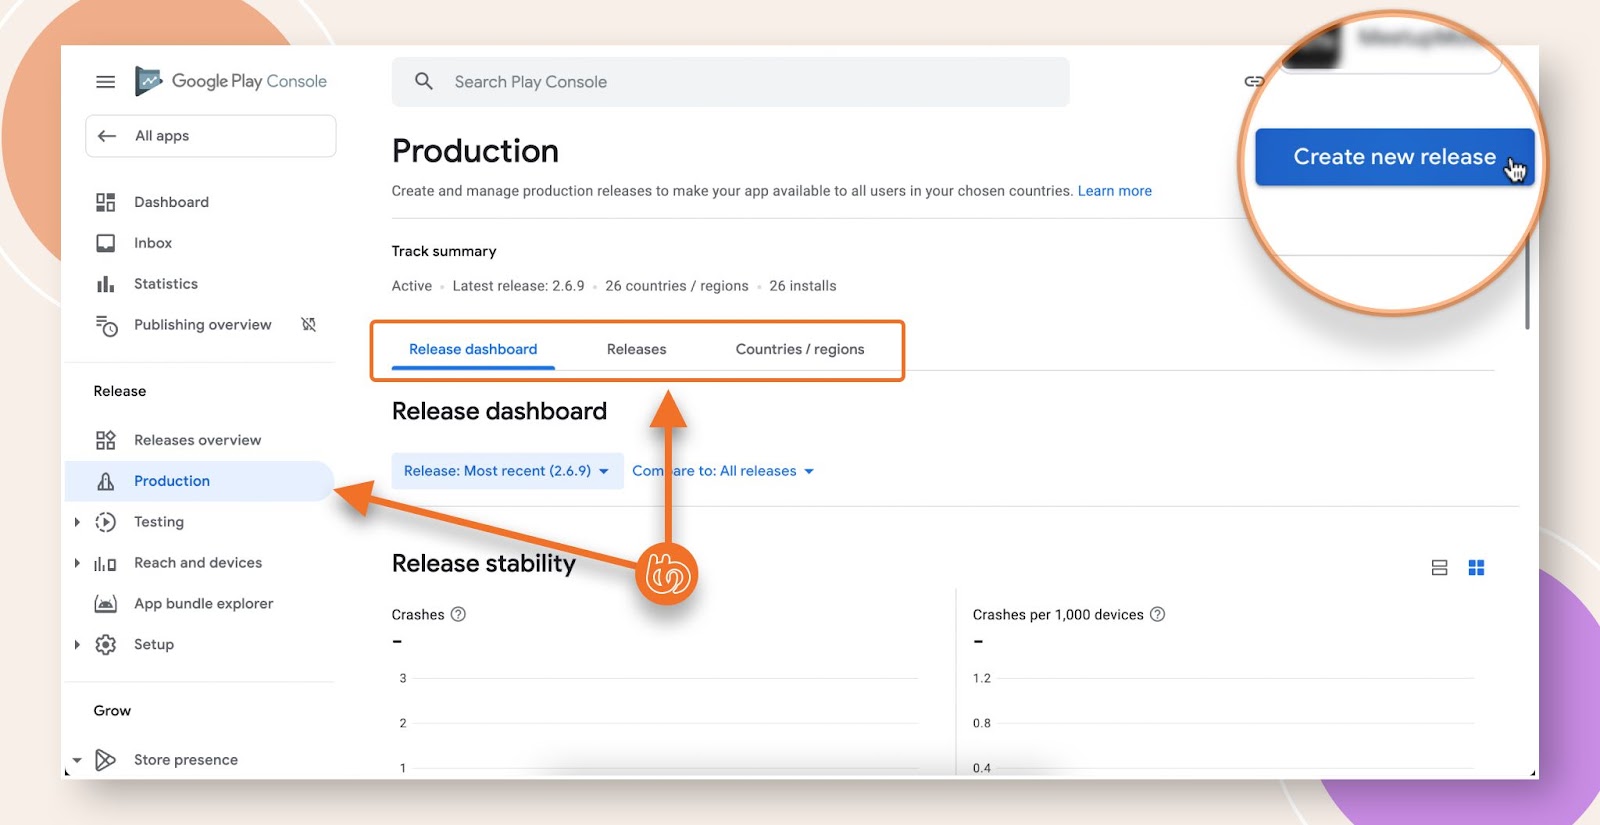
Firstly you will notice the box around your release options which i will just mention but are not needed… On the right in the box you will see ‘Countries / Regions’ if you set up your app originally to only be available in set countries but now have changed your mind and would like to add or remove countries, you can do this here first before creating your new release.
The middle option ‘Release’ is your history of releases, shows you which ones you have previously uploaded and when and which is active right now. There is nothing to be changed here and is for viewing at your pleasure.
In ‘Release Dashboard’ you will see the big blue button in the top right corner ‘Create New Release’ this is what we want so go ahead and click it.
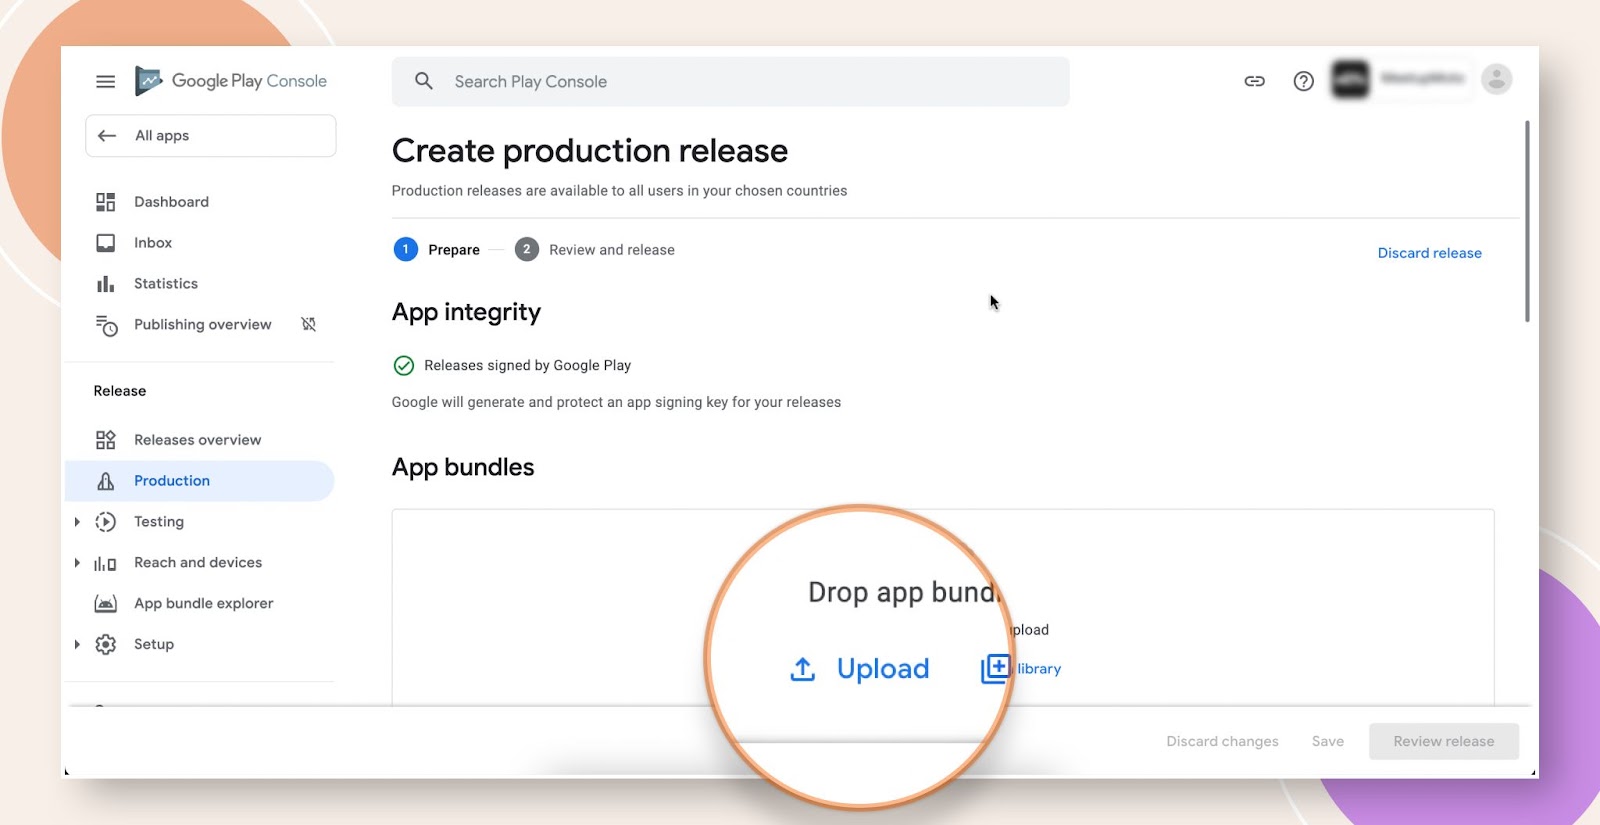
Upload Build
Now you have started the new release and the first thing you need to do is upload the new build you downloaded from your Buddyboss builds which should be in your downloads folder – find it and upload it here. We name your build files with a mixture of information but if you want you can go ahead and rename it if you want but do not change the file format from .AAB.
This could take a good few minutes or longer depending on your Internet speed so either move on or go make yourself a cup of tea or coffee…
Ok great while that is doing that scroll down to the bottom and you will see a section called ‘Release Details’ which you need to fill out.
In the image below I have added a ‘Release Name’. I have used my build versions, you may find that a lot of app creators use version numbers that relate to them in some way so they can track builds if something goes wrong. Again this is up to you and no one knows what the numbers relate to except you and your team.

Next you will need to add ‘Release Notes’. You just want to add why you have released this build, you can be as basic or as in depth as you like – ‘Bug Fix’ ‘Design Updates’ etc. Maybe you might not want to say exactly why so you can be a little creative here also as you can see i have been as vague as possible but still shows you are always working to better your apps user experience.
Please Note: the <en-US> </en-US> syntax must stay above and below your text otherwise you will see a red error until you move them back.
Once you have completed these steps you will notice in the bottom right corner was or is a grayed out button named ‘Review Release’ which will only highlight blue once you have done these three things!
So assuming you are following along – Click it!
You will now come to your releases review page. There are three things here to be most aware of;
- You will notice my release has 4 yellow warnings. You might not have any here great but as you go on you might start seeing one or 2. This is not a problem and will not stop your app from publishing. If you expand them these are made up of things like; I haven’t yet filled out that my app has a ‘Physical Address’ or the ‘Government Data’ section needs updating… I don’t want a physical location for my app and I will get round to updating the data at some point… If however you are seeing a ‘Red Error’ then this must be dealt with before you start the rollout as this will get rejected. If your not sure what the error means take a screenshot or screen recording and open a support ticket with us and we will help you out.
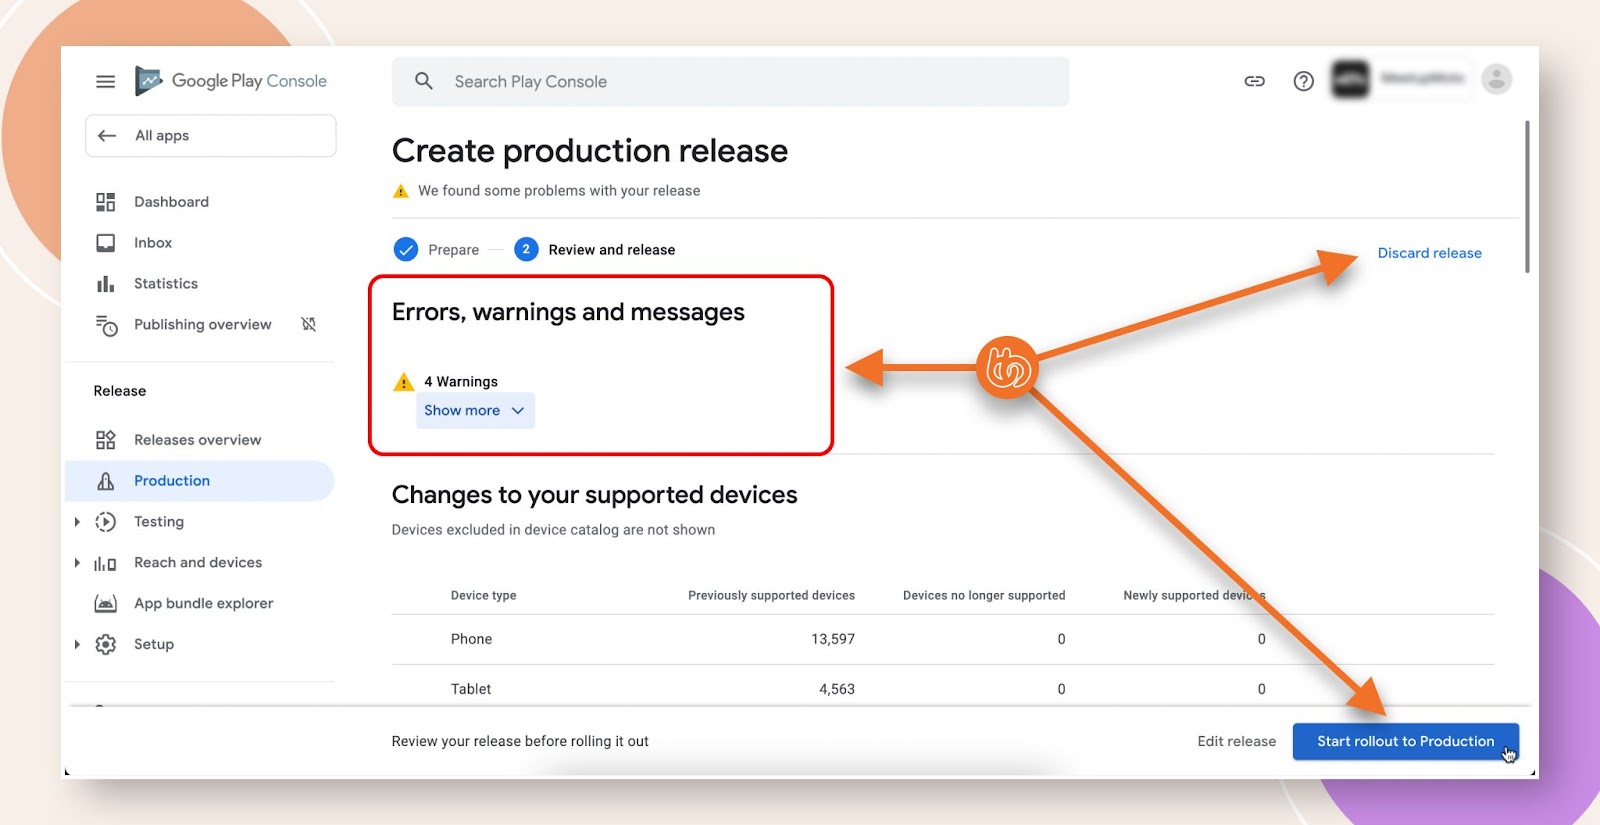
- Discard Release – If you choose you dont want this release anymore and discard it then this will also remove your build and you will have to upload again if you start again. If you just want to come back to this at a later date just click off of this page and this will always be sitting here waiting for you as you will not be able to create a new release until you either finish, delete or edit this one.
- This is the one we want: ‘Start rollout to Production’ big blue button in the bottom right corner. And as always Click it!
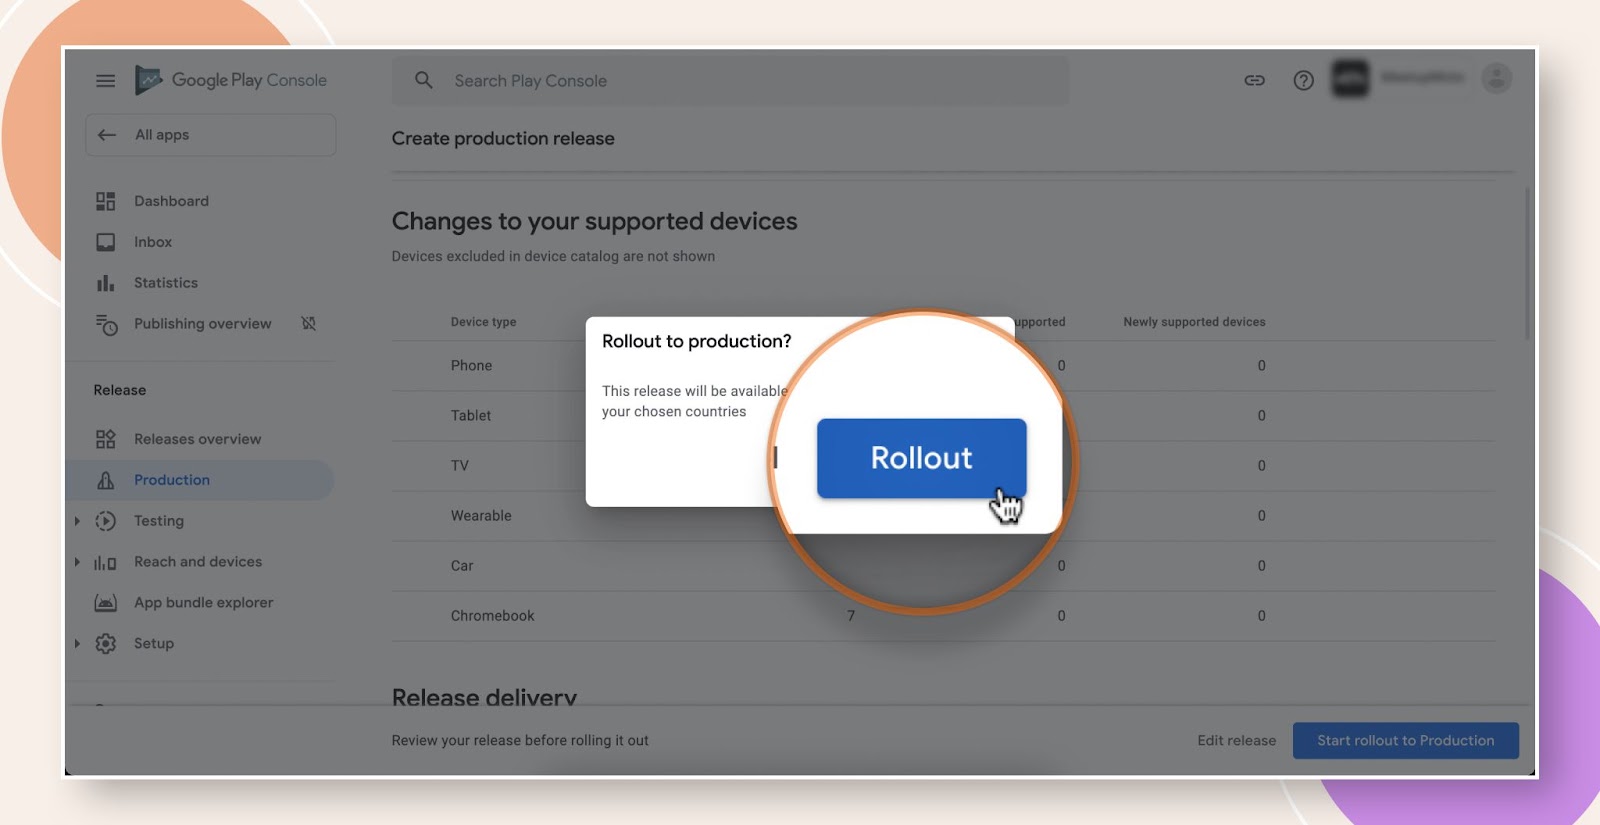
You will then be redirected back to your Production page where you started and can now see your app in review at Google!
Respond to Google Rejections
Google may reject your release if they believe your app is out of compliance with their Google Play Policies.
You will receive an email from Google with details of why your app was rejected and explicit instructions on how to resolve the issues.
If the rejection is due to metadata, such as your app’s store listing, privacy policies or content ratings, you will be able to resubmit your app after resolving those issues in the Google Play Console.
If the rejection is due to issues found within your app, you will need to submit a new build and Production Release to Google for review.
After Approval by Google
After approval by Google, your app should immediately be available for download in the Google Play Store, in the countries and regions specified for your Production Releases in the Google Play Console. Also releasing updates generally get reviewed a lot quicker than the first time publishing your app.
If you turn on managed publishing, your app won’t be published until you have reviewed, approved and published it from the ‘Managed publishing’ page in the Google Play Console.


