Appearance Modes
Learn how to set your community’s appearance mode (light, dark, or auto). These simple settings help you instantly match your site’s look and feel to your brand and improve the member experience.
Configure your appearance settings:
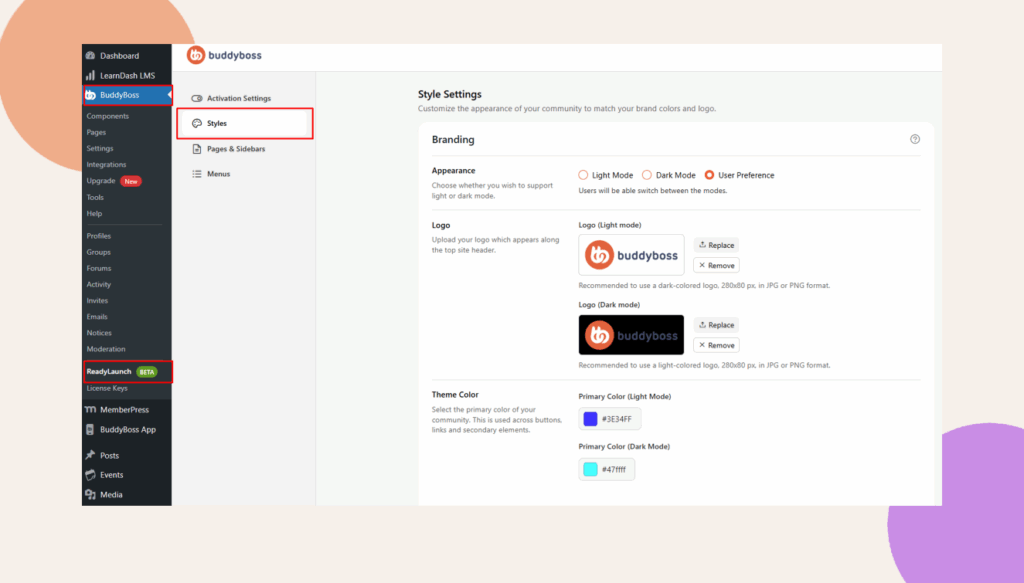
1. Go to ReadyLaunch > Styles > Branding > Appearance.
2. Select from:
- Light Mode – Enables you to upload a dedicated logo optimized for light-themed interfaces. You can also configure a primary color specifically for Light Mode to maintain visual consistency.
- Dark Mode – Allows you to upload a logo tailored for dark-themed interfaces. Additionally, you can define a primary color for Dark Mode to enhance readability and aesthetic alignment.
- User Preference – When this option is selected, you can upload separate logos for both Light and Dark Modes. It also enables the configuration of distinct primary colors for each mode, allowing the interface to adapt dynamically based on the user’s system preferences.
Pro Tip – User Preference
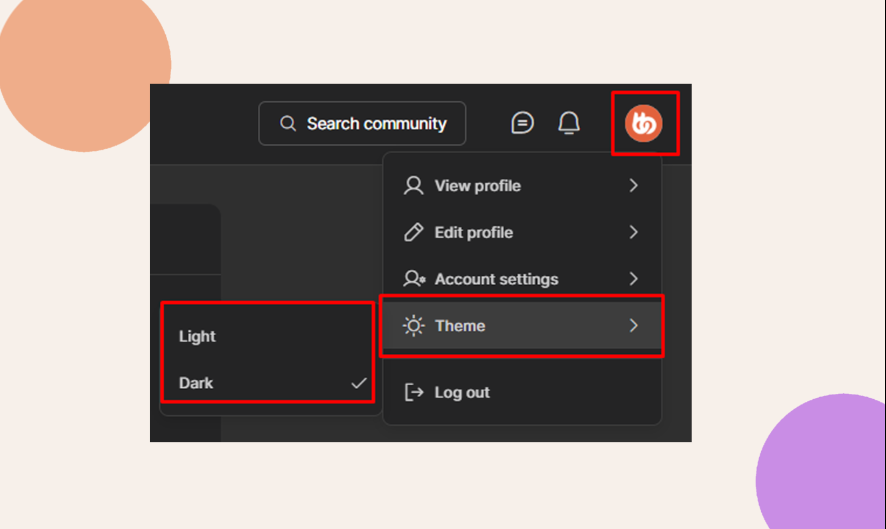
If you enable User Preference, members can pick their own appearance mode. From the frontend, they just:
1. Click their profile image to open the dropdown menu.
2. Select Theme.
3. Choose Light Mode or Dark Mode.
This gives your community a more personalized and user-friendly experience.