Setting Up Your App Images & Icons
App visuals define your members’ first impressions. From the splash screen to the login page, every image shapes your app’s identity.
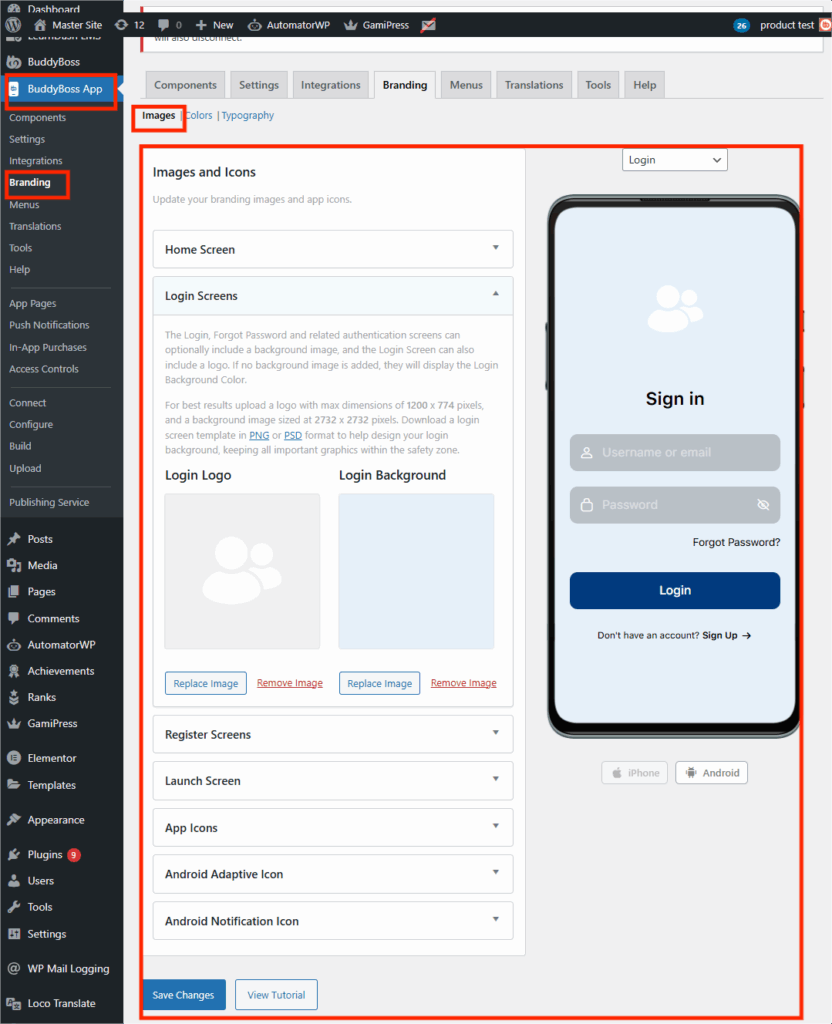
- In WordPress Admin, go to BuddyBoss App > Branding > Images & Icons.
2. Upload each required image in the correct format and dimensions:
| Section | Description | File Format | Dimensions |
| Home Screen Logo | Displayed in the app’s home header | PNG/PSD | 1200 × 180 px |
| Login Logo | Appears above login fields | PNG/PSD | 1200 × 774 px |
| Login Background | Background image on the login screen | PNG/PSD | 2732 × 2732 px |
| Register Background | Background on registration screen | PNG/PSD | 2732 × 2732 px |
| Launch Screen | Splash screen when app loads | PNG/PSD | 2732 × 2732 px |
| iOS App Icon | Icon users see in App Store and device | PNG/PSD | 1024 × 1024 px |
| Android App Icon | Icon for Android devices | PNG/PSD | 1024 × 1024 px |
| Android Adaptive Icon (Foreground + Background) | For Android adaptive layouts | PNG/PSD | 1024 × 1024 px each |
| Android Notification Icon | Small icon for push notifications | PNG/PSD | 256 × 256 px |
3. Use the built-in Resize Tool to adjust images.
4. Review how each image looks in the Preview for iOS and Android.
5. Click Finish for each upload, then Save Changes at the bottom of the page.
Tips for Success:
- Use transparent PNGs for logos.
- Keep splash/login screens clean and high-resolution.
- Avoid placing logos or text near image edges; these areas may get cropped.