Customizing Your App Typography
Fonts play a big role in how professional and user-friendly your app feels. The right typography strengthens your brand, improves readability on mobile devices, and creates a consistent look across your app.
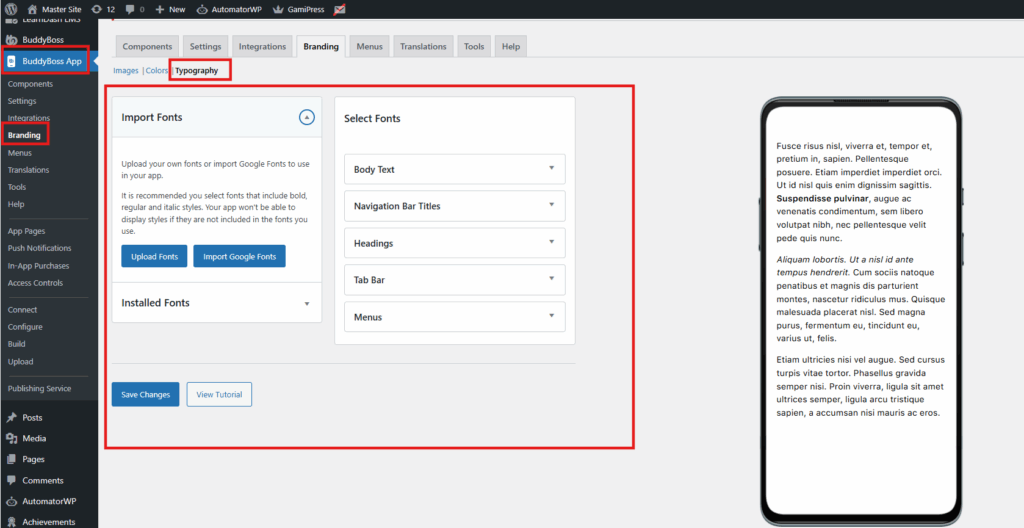
- In WordPress Admin, go to BuddyBoss App > Branding > Typography.
- Choose a Font Family
- Select from the available system fonts or Google Fonts.
- Pick a font that reflects your brand and is easy to read on small screens.
- You can also upload custom fonts or import additional Google Fonts.
- Set Font Sizes & Weights
- Define sizes for different text levels:
- Headings → larger for section titles.
- Body Text → comfortable for reading.
- Adjust font weights (light, regular, bold) to match your style.
- Define sizes for different text levels:
- Click Save Changes and preview updates in real-time.
Tips for Success:
- Choose fonts that balance style with readability.
- Limit your font choices to 1–2 families for a clean, consistent design.
Always test on both iOS and Android preview screens.