The Tab Bar (bottom menu) gives quick access to key features, while the “More” screen organizes the rest.
In WordPress Admin, go to BuddyBoss App > Menus > Tab Bar.
Add and organize tabs such as Courses, Groups, Activity Feed, Profile, or custom links.
Drag and drop to reorder — the most important tabs should be on the left.
You can display up to 4 tabs in the Tab Bar. Extra items automatically move to the “More” screen.
Customize each tab’s icon (BuddyBoss icon library) and label (keep it short and intuitive).
Click Save Changes and preview.
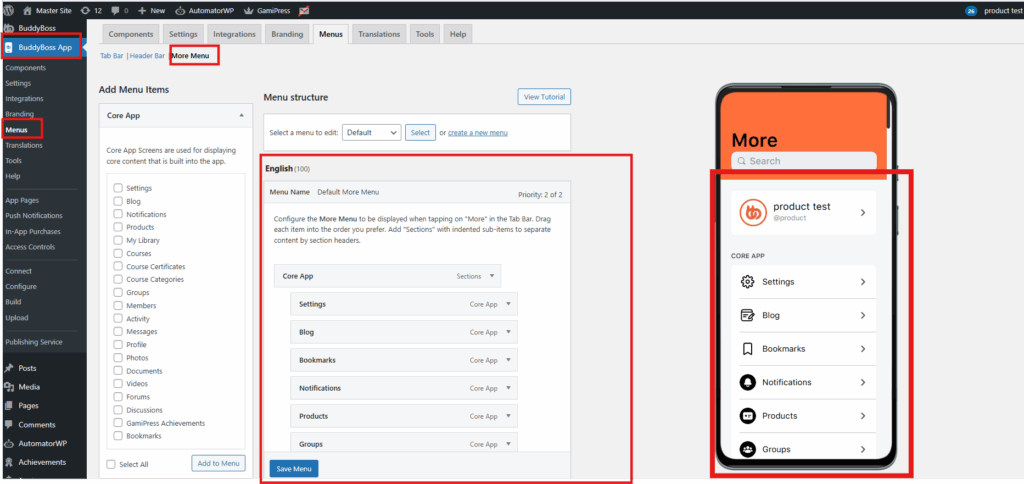
Screenshot of the BuddyBoss App Menus page in WordPress with the Tab Bar tab open. The left panel lists Core App menu items, while the center shows the Tab Bar menu structure. On the right, a mobile preview displays the bottom tab bar with matching icons and labels.Screenshot of the BuddyBoss App Menus page in WordPress with the More Menu tab open. The left panel lists available Core App items. The center shows the menu structure with items arranged. On the right, a mobile preview displays the More Menu screen with icons and labels.
A clean tab bar and organized “More” screen keep navigation simple and scalable.